
Difficulty Level: Intermediate
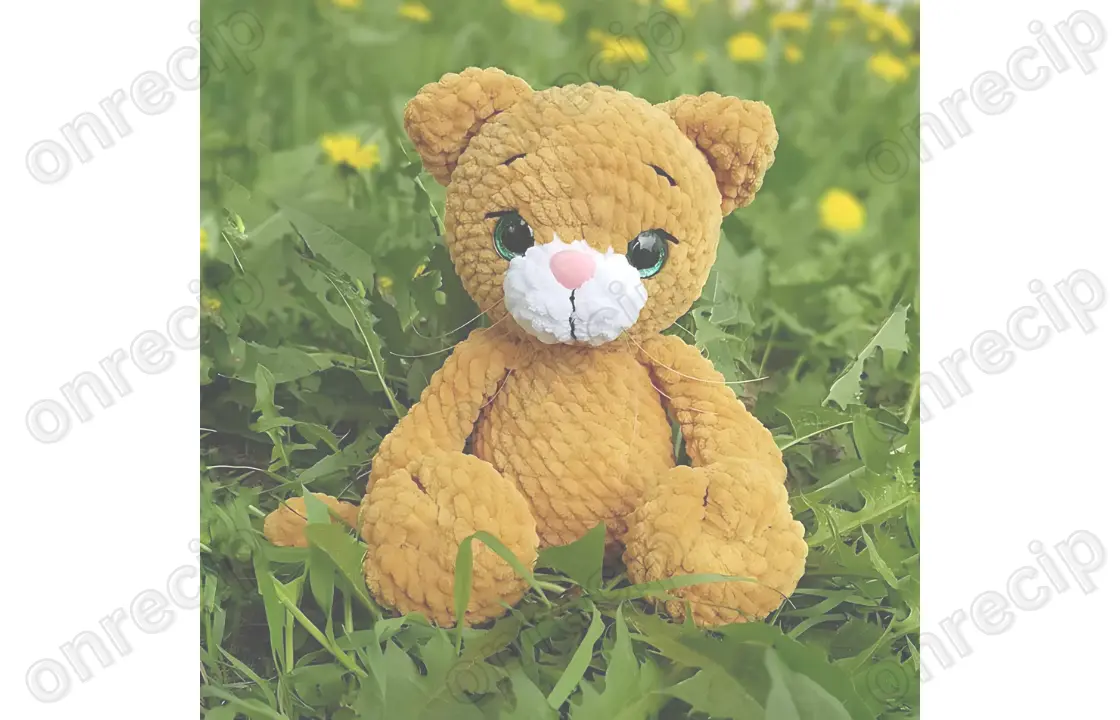
This is a free crochet pattern to create an adorable plush kitten using amigurumi technique. You can use any plush yarn such as Himalaya Dolphin Baby, YarnArt Dolce, or similar alternatives. For the kitten’s face, you’ll need smooth yarn, such as YarnArt Jeans. You can choose the eyes and nose as per your preference, and large glass-colored eyes and a velvet nose would look particularly cute. You can also add whiskers made of fishing line if desired.
Materials and Tools:
- Himalaya Dolphin Baby or a similar plush yarn
- YarnArt Jeans (for detailing the face and paws)
- Crochet hook size 3.5 mm
- 16 mm safety eyes for toys
- 15×13 mm safety nose for toys
- Stuffing material
- Stitch markers
- Pins
- Needle for sewing the parts together
- Scissors
Abbreviations:
- MR – magic ring (slip knot)
- sl st – slip stitch
- ch – chain
- sc – single crochet
- inc – increase
- dec – decrease
- (…) x n – repeat the instructions inside the parentheses n times
Pattern Instructions for the Plush Kitten:
Upper Paws (Make 2):
- 6 MR
- 6 inc (12)
- (1 sc, inc) x 6 (18)
4-5. 18 sc (18) - 9 dec (9) – You can lightly stuff the lower part of the paw, but it’s optional.
7-12. 9 sc (9)
Fold the paw in half and crochet 4 sc across. Cut the yarn and fasten off. Using fine yarn (YarnArt Jeans), mark the fingers on the lower part of the paw by making 2 tight stitches through the paw.
Lower Paws (Make 2):
- Ch 5, start in the 2nd ch from the hook, inc, 2 sc, 3 sc in the last ch, continue on the other side of the chain: 3 sc (10)
- 2 inc, 2 sc, 3 inc, 2 sc, inc (16)
- (1 sc, inc) x 2, 2 sc, (1 sc, inc) x 3, 3 sc, inc (22)
- (2 sc, inc) x 2, 2 sc, (2 sc, inc) x 3, 4 sc, inc (28)
- 28 sc (28)
- 8 sc, 8 dec, 4 sc (20)
- 6 sc, 6 dec, 2 sc (14)
- 6 sc, 3 dec, 2 sc (11)
9-15. 11 sc (11) – Stuff the lower part of the paw lightly. - 10 sc, fold in half and crochet 5 sc across. Cut the yarn and fasten off. Using fine yarn (YarnArt Jeans), mark the fingers in the same way as for the upper paws.
Tail:
- 8 MR
2-21. 8 sc (8)
Fold in half and crochet 4 sc across. Cut the yarn and fasten off.
Ears (Make 2):
- 6 MR
- (1 sc, inc) x 3 (9)
- (2 sc, inc) x 3 (12)
- (3 sc, inc) x 3 (15)
- (4 sc, inc) x 3 (18)
Cut the yarn, leaving a long tail for sewing the ears onto the head.
Body:
- 6 MR
- 6 inc (12)
- (1 sc, inc) x 6 (18)
- (2 sc, inc) x 6 (24)
- (3 sc, inc) x 6 (30)
- (4 sc, inc) x 6 (36)
- In this round, attach the lower paws and tail. 5 sc, 5 sc with paw, 12 sc, 5 sc with paw, 5 sc, 4 sc with tail (36)
8-9. 36 sc (36) - (4 sc, dec) x 6 (30)
11-12. 30 sc (30) - (3 sc, dec) x 6 (24)
14-15. 24 sc (24) - (2 sc, dec) x 6 (18)
- In this round, attach the upper paws. 4 sc, 4 sc with paw, 4 sc, 4 sc with paw, 2 sc (18)
Finish with a slip stitch and leave a long tail for sewing the head onto the body.
Head:
Start crocheting with white yarn.
- Ch 5, crochet in the 2nd chain from the hook, inc, 2 sc, 3 sc in the last ch, continue on the other side of the chain: 3 sc (10)
- 2 inc, 2 sc, 3 inc, 2 sc, inc (16)
- 16 sc (16)
- 16 sl st (16) – Switch to the main color yarn.
- 16 inc (32)
- (2 sc, inc) x 7, 11 sc (39)
- 4 sc, (5 sc, inc) x 3, 17 sc (42)
8-13. 42 sc (42)
Insert the safety nose between the 2nd and 3rd rounds. The eyes (16 mm) are inserted between the 5th and 6th rounds, with a distance of 10 stitches between them.
- (5 sc, dec) x 6 (36)
- (4 sc, dec) x 6 (30)
- (3 sc, dec) x 6 (24)
- (2 sc, dec) x 6 (18)
- (1 sc, dec) x 6 (12)
- 6 dec (6)
Finish with a slip stitch, cut the yarn, and close the opening using a needle.
Assembling the Toy:
Sew the ears to the head between rounds 12 and 13, placing them in an arc shape. The distance between the ears should be 7-8 stitches. Using YarnArt Jeans, embroider eyebrows, eyelids above the eyes, and separate the white muzzle into two cheeks. Optionally, make a small indent by pulling the point above the nose toward the lower part of the mouth.
Sew the head onto the body.
This pattern creates a soft and cuddly plush kitten, perfect as a gift or decoration.
Author: Ekaterina Chirkova / translated by onrecip
Enjoy!