
Difficulty level: easy
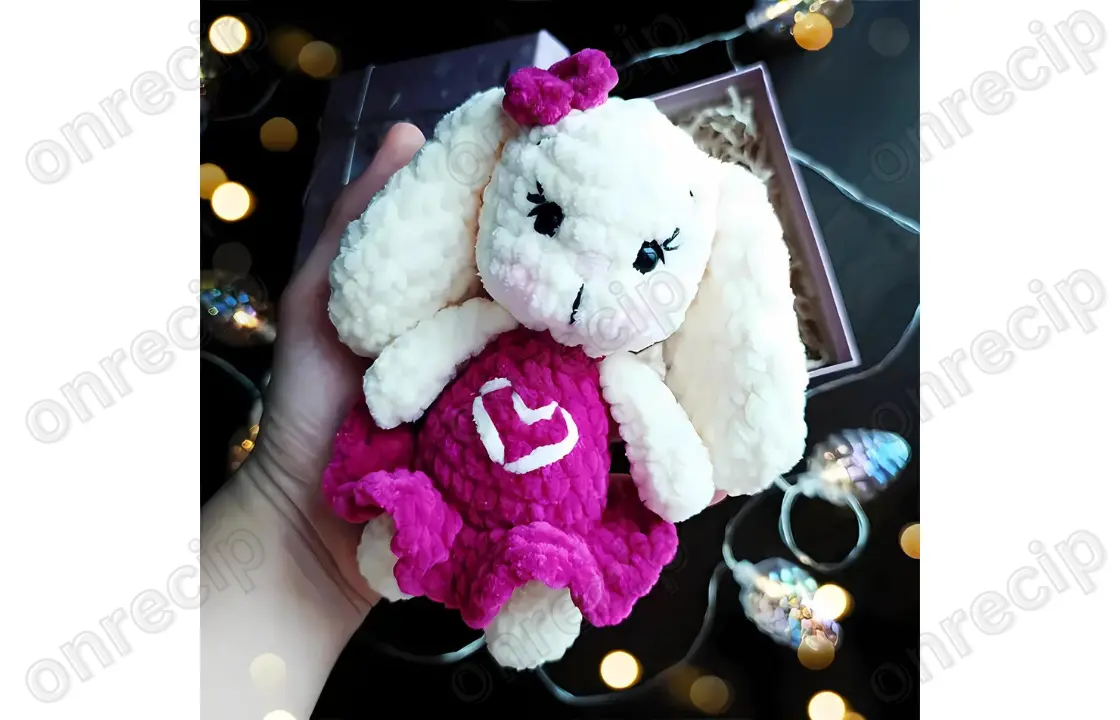
This pattern allows you to crochet a small bunny using plush yarn. Any plush yarn and a suitable crochet hook can be used for amigurumi. The nose, mouth, and eyelashes are embroidered with a thin, smooth thread. You can embroider a heart on the dress for decoration.
The toy cannot stand on its own without support.
Materials and tools
- Plush yarn: main color for the bunny and additional color for the dress
- Thread for embroidering the face
- Crochet hook 4-4.5 mm
- Safety eyes
- Stuffing for toys
- Stitch markers
- Dry pastel or blush
- Needle for sewing parts
- Scissors
Abbreviations
- MR — magic ring
- sl st — slip stitch
- sc — single crochet
- inc — increase
- dec — decrease
- BLO — back loop only
- (…) x n — repeat n times
Amigurumi Baby Bunny crochet pattern
Arms (2 pieces)
- 6 sc in MR (6)
2-7. 6 sc (6)
Fold the edges together and crochet 2 sc through both edges of the arm. No stuffing needed (if using a 4 or 4.5 mm hook).
Legs (2 pieces)
- 6 sc in MR (6)
- (1 sc, 1 inc) x 3 (9)
3-6. 9 sc – 4 rows (9)
Finish with a slip stitch. Secure the yarn on the first leg and cut. Do not cut the yarn on the second leg, join the yarn of the contrasting color and start crocheting the body.
Body
- In the next sc on the leg, crochet 1 sc in bright color, 2 ch, join the first leg, 9 sc around the leg, then either (2 dec: (corner + chain stitch) and (chain stitch + corner) – this gives a tighter finish to this area, as holes often form here), or simply 2 sc along the chain (as usual when joining legs in such toys), then 9 sc around the second leg, 2 sc along the chain. Place a marker! (22)
- 22 sc around (22)
- 22 sc in BLO – we’ll use the freed loops for the skirt (22)
4-5. 22 sc (22) - 4 sc, 1 dec, 3 sc, 1 dec, 4 sc, 1 dec, 3 sc, 1 dec (18)
- 18 sc (18)
- (4 sc, 1 dec) x 3 (15)
- (3 sc, 1 dec) x 3 (12)
- (2 sc, 1 dec) x 3 (9)
Stuff the legs and body.
- Attach the arms to the sides of the body.
I did: 2 sc, 2 sc together with the arm, 3 sc, 2 sc together with the arm + 1 sc offset (9). If you cannot attach the arm exactly at the side at first, make an offset stitch beforehand, continue crocheting according to the pattern, and skip the offset stitch at the end of the row.
Then, smoothly transition to crocheting the head.
Head
- Change to light-colored yarn and crochet 9 inc (18)
- (2 sc, inc) x 6 (24)
- (3 sc, inc) x 6 (30)
- (4 sc, inc) x 6 (36)
- Align the marker evenly at the center of the bunny (focus on the neck and back) and crochet: 8 sc, 10 dec with hdc, 8 sc (26)
- 26 sc (26)
- 26 sc (26)
- Align the marker at the center again and crochet: 7 sc, 1 dec, 8 sc, 1 dec, 7 sc (24)
- (2 sc, dec) x 6 (18)
- (1 sc, dec) x 6 (12)
Insert the 9 mm eyes between the 17th and 18th rows, 4-5 sc apart. Stuff the head.
- Close the hole in the head with decreases until the end. Secure and hide the yarn in the head.
Skirt
Return to the 3rd row of the body and find the free front loops. Turn the bunny upside down and crochet through the loops as follows:
- 2 ch for lifting (1 time), 3 sc in each front loop to the end of the row, finish with a sl st to the start of the row.
- Now crochet the edging, repeating the following sequence to the end of the row: {3 ch, 1 sc through every other stitch of the previous row} – repeat to the end of the row. In the end, the edge of the skirt will have loops.
Ears (2 pieces)
- 6 hdc in MR (6)
- 6 inc from hdc (12)
3-5. 12 hdc (12) – 3 rows - (2 hdc, 1 dec from hdc) x 3 (9)
7-8. 9 hdc (9) – 2 rows - (1 hdc, 1 dec from hdc) x 3 (6)
- 6 hdc (6)
Fold the ear in half and crochet 2 hdc through both edges, leaving a long tail for sewing.
Sew the ears at about the third row from the top of the head.
Bow
Chain 3 ch.
In the second chain from the hook, crochet 3 dc, in the next stitch also 3 dc, and join with a sl st to the start of the chain. Leave a long yarn tail and wrap it around the center of the piece to form a figure-eight. Secure the yarn tail with the starting yarn, and sew the bow to the head using the long yarn tail. Secure and hide the yarn in the head, trim the excess.
Face shaping and embroidery
To give the bunny’s face expression, you need to make some shaping. There will be two shaping points. We will shape the area around the eyes and the cheeks.
Eye shaping
Insert the needle with yarn at the mouth area (1-2 rows above the neck), exit at point A, reinsert at point B, exit at point C, reinsert at point D, and exit back at the mouth area. Pull the threads tight to create the shaping, and tie the threads securely, hiding them inside the head.
Cheek shaping
Insert the needle with yarn at the mouth area, exit at the nose area (located on the same line with points A and D in the middle), wrap the thread around the outside of the head perpendicularly downward and reinsert at the mouth area, exit at the nose area again, pull tight to form the cheeks, tie the threads securely at the mouth area, and hide them inside the head. The cheeks are ready.
After completing the shaping, embroider the nose with pink cotton thread or embroidery floss. Then embroider the eyelashes, eyebrows, and a small line between the bunny’s cheeks using black thread.
The final touch is to apply blush to the bunny’s cheeks using blush or pastel
Author: Olga Solnechnaya – @ollysunnytoys / translated by onrecip
Enjoy!