
You can use leftover yarn in different colors for this project.
Materials:
- Diameter of the toy (with tentacles included): _ cm (inches)
- 8 mm safety eyes
- Hook size: 4 mm
- Yarn consumption for one jellyfish: approximately 1/3 skein of plush yarn, Himalaya Dolphin Baby
- Stuffing (holofiber or synthetic stuffing)
Abbreviations:
- MR: Magic Ring
- SC: Single Crochet
- DC: Double Crochet
- INC: Increase
- DEC: Decrease
- CH: Chain
- SL ST: Slip Stitch
Body:
- 7 SC into MR (7)
- INC in each stitch (14)
- (1 SC, INC) *7 (21)
- (2 SC, INC) *7 (28)
- (3 SC, INC) *7 (35)
6-12. 35 SC (35)
Insert eyes between rounds 9 and 10, 6 SC apart.
- (3 SC, DEC) *7 (28)
Stuff the body as you go.
- (2 SC, DEC) *7 (21) — crochet in back loops only for this round
- (1 SC, DEC) *7 (14)
- 7 SC (7)
Stuff the body firmly.
Leave a 30 cm yarn tail and sew the opening shut. Fasten and hide the yarn.
Skirt:
Attach yarn in round 14, which was worked in back loops. The skirt will be worked in front loops.
Secure the yarn and chain 2.
In each front loop of round 14, work 2 DC. (42 DC)
Join the last and first DC with a SL ST.
Fasten and hide the yarn.
Tentacles:
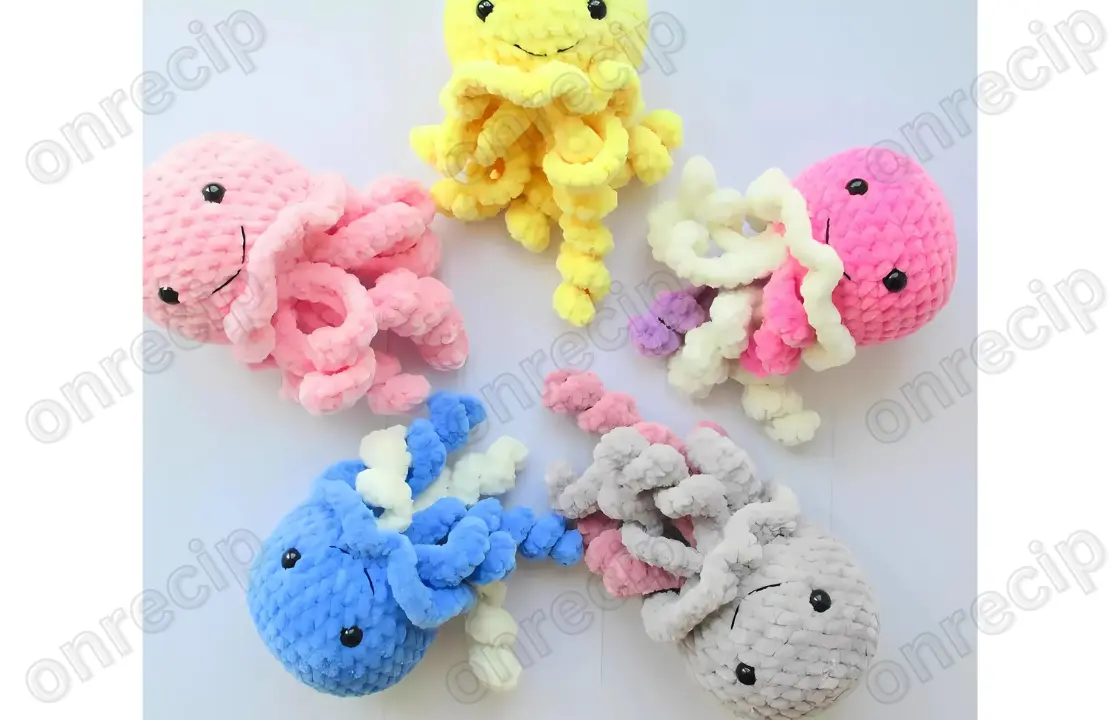
I made 6 different types of tentacles.
Depending on the length of the chain and the stitch pattern, the tentacles will vary in length and curliness.
You can make different types like I did, or stick to just one or two. It’s up to you!
- Chain 15, starting from the second chain from the hook, work (1 SC, INC) *6, 2 SC (20).
Leave a tail of about 20-25 cm for sewing onto the body. - Chain 20, starting from the second chain from the hook, work (2 SC, INC) *6, 1 SC (25).
- Chain 30, starting from the second chain from the hook, work (2 SC, INC) *9, 2 SC (38).
- Chain 20, work 1 SC in each chain (19).
- Chain 23, work 1 SC in each chain (22).
- Chain 25, work 1 SC in each chain (24).
Sew the tentacles to the underside of the body.
Smile Embroidery:
Insert the needle at point 1 and bring it out at point 2. Pull the thread through.
Then insert the needle at point 3 and bring it back out at point 1.
The thread between points 2 and 3 should go under the thread at point 1. Tie a knot at point 1 to secure the smile. Hide the thread ends inside the toy.
The jellyfish is ready!
When sharing your toys, don’t forget to credit the author of the tutorial:
Autor: @Victoria_Hobby / translate by onrecip
Enjoy!

