
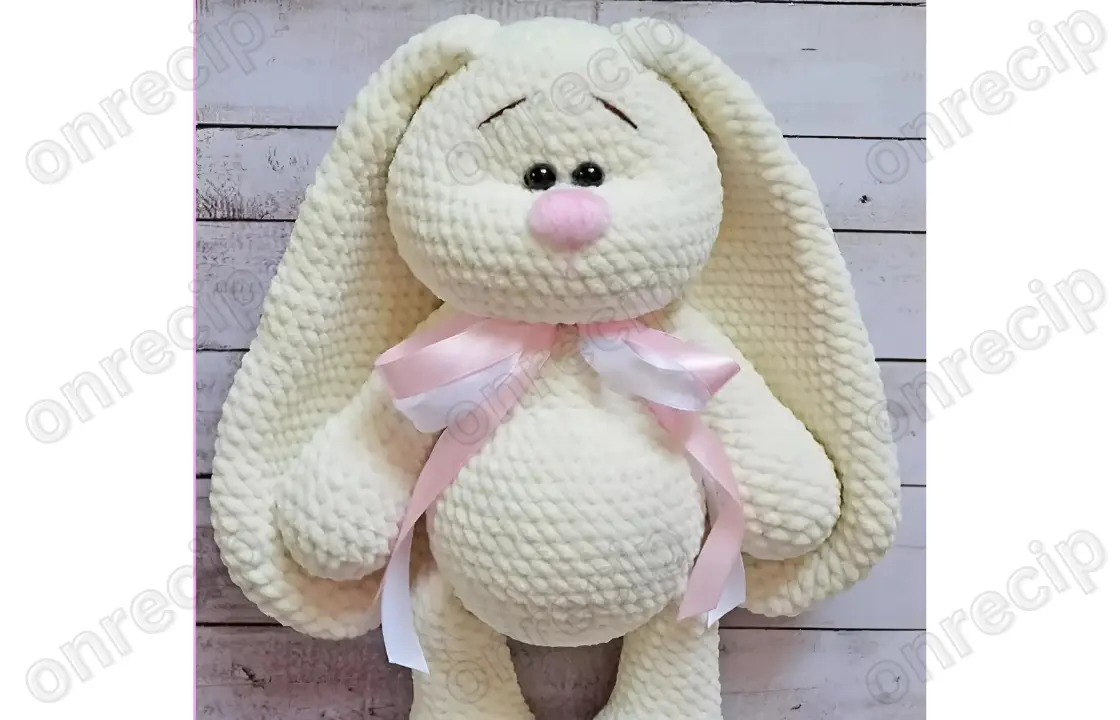
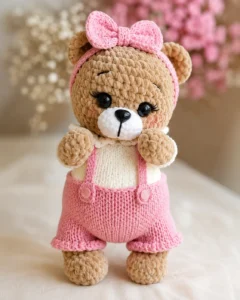
This bunny is made following the tutorial by Marina Grigorevskaya with my modifications.
Bunny height: 32 cm.
Yarn: Himalaya Dolphin Baby (approximately 2.5 skeins).
Hook size: 4 mm.
Bead eyes.
Nose: YarnArt BABY yarn. Hook size: 2 mm.
(The nose was brushed, which is why it’s so fluffy).
Lower Legs:
- 6 sc into a magic ring
- Starting from the second chain from the hook: 5 sc, 3 sc into the last stitch, turn, crochet on the other side: 4 sc, inc (14)
- inc, 4 sc, inc * 3, 4 sc, inc * 2 (20)
- 1 sc, inc, 5 sc, inc, 3 sc, inc, 5 sc, inc, 2 sc (24)
- 2 sc, inc, (5 sc, inc) * 3, 3 sc (30)
- (1 sc, inc) * 2, 5 sc, inc, 1 sc, inc, 3 sc, inc, 1 sc, inc, 5 sc, inc, 1 sc, inc, 2 sc (36)
- 36 sc in the back loops (36)
8-9. 36 sc (2 rounds) - 9 sc, dec, (1 sc, dec) * 5, 8 sc, dec (29)
- 8 sc, dec * 2, 3 sc, dec * 2, 8 sc, dec (24)
- 8 sc, dec * 4, 8 sc (20)
- 6 sc, dec, 4 sc, dec, 6 sc (18)
- 7 sc, dec * 2, 7 sc (16)
Rounds 15-24: 16 sc (10 rounds) - 2 sc, do not finish the round.
Fold the edges together, and crochet sc through both sides to close. Secure the yarn, cut it, and hide the tail.
Ears:
- 6 sc into a magic ring (6)
- inc * 6 (12)
- (1 sc, inc) * 6 (18)
- (2 sc, inc) * 6 (24)
- (3 sc, inc) * 6 (30)
- (4 sc, inc) * 6 (36)
- (5 sc, inc) * 6 (42)
Rounds 8-12: 42 sc (5 rounds) - (5 sc, dec) * 6 (36)
Rounds 14-18: 36 sc (5 rounds) - (4 sc, dec) * 6 (30)
Rounds 20-24: 30 sc (5 rounds) - (3 sc, dec) * 6 (24)
Rounds 26-30: 24 sc (5 rounds) - (2 sc, dec) * 6 (18)
Rounds 32-36: 18 sc (5 rounds) - (1 sc, dec) * 6 (12)
Rounds 38-42: 12 sc (5 rounds)
Do not stuff the ears. Fold the edges together, and crochet sc through both sides to close. Secure the yarn, cut it, and hide the tail.
Upper Arms:
- Chain 4
- Starting from the second chain from the hook: 2 sc, 3 sc into the last stitch, turn, crochet on the other side: 1 sc, inc (8)
- inc, 1 sc, inc * 3, 1 sc, inc * 2 (14)
- 1 sc, inc, 3 sc, inc, (1 sc, inc) * 2, 3 sc, inc (19)
Rounds 5-9: 19 sc (5 rounds) - 7 sc, dec, 1 sc, dec, 7 sc (17)
- 4 sc, dec * 2, 1 sc, dec * 2, 4 sc (13)
Rounds 12-21: 13 sc (10 rounds) - 2 sc, do not finish the round.
Fold the edges together, and crochet sc through both sides to close. Secure the yarn, cut it, and hide the tail.
Body-Head (crocheted in one piece):
- 6 sc into a magic ring (6)
- inc * 6 (12)
- (1 sc, inc) * 6 (18)
- (2 sc, inc) * 6 (24)
- (3 sc, inc) * 6 (30)
- (4 sc, inc) * 6 (36)
- 36 sc (36)
- (5 sc, inc) * 6 (42)
- (6 sc, inc) * 6 (48)
Rounds 10-16: 48 sc (7 rounds) - (6 sc, dec) * 6 (42)
- (5 sc, dec) * 6 (36)
- 3 sc, dec * 6, 21 sc (30) — this is the belly section
Rounds 20-23: 30 sc (4 rounds) - (3 sc, dec) * 6 (24)
- 24 sc (24)
- dec * 12 (12)
For the head:
- inc * 12 (24)
- (1 sc, inc) * 12 (36)
- (5 sc, inc) * 6 (42)
- (6 sc, inc) * 6 (48)
- (7 sc, inc) * 6 (54)
- (8 sc, inc) * 6 (60)
Rounds 33-37: 60 sc (5 rounds) - (8 sc, dec) * 6 (54)
- (7 sc, dec) * 6 (48)
- (6 sc, dec) * 6 (42)
- 42 sc (42)
- (5 sc, dec) * 6 (36)
- (4 sc, dec) * 6 (30)
- 30 sc (30)
- (3 sc, dec) * 6 (24)
- 24 sc (24)
- (1 sc, dec) * 6 (16)
- dec * 8
Pull the hole closed. Secure the yarn, cut it, and hide the tail.
Assembly:
- Attach the eyes between rounds 40-41, leaving 2-3 stitches between them.
- Shape the face by inserting the needle between rounds 26 and 27 (where you made the 12 increases and 12 decreases). Then, find round 40 with the eyes. Make several stitches to pull the fabric tight. Once you’re satisfied with the result, tie a knot and hide the tail.
- Sew the nose between rounds 34-37 of the head.
- Attach the ears around round 44 of the head.
- Attach the upper arms around round 24 of the body.
- Attach the lower legs around round 8 of the body.
- Embroider the eyebrows.
Your bunny is ready!
Author: Olga Filippova @zefirka.room / translate by onrecip
Enjoy!