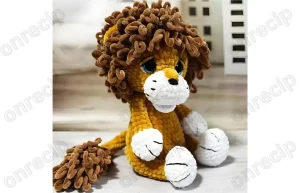
Legs (2 parts):
Stuff the legs as you crochet. Start with the additional color.
- Chain 6, in the second chain from the hook 4 sc, (3 sc in one stitch), 3 sc, 1 inc (12)
- 1 inc, 3 sc, 3 inc, 3 sc, 2 inc (18)
- 1 sc, 1 inc, 3 sc, (1 sc, 1 inc) x 3, 3 sc, (1 sc, 1 inc) x 2 (24)
Change to the main color.
4-6. 24 sc without changes (3 rows), the marker is positioned at the back of the leg. - 6 sc, 6 dec, 6 sc (18)
- 1 sc, 1 dec, 4 sc, 2 dec, 4 sc, 1 dec, 1 sc (14)
Stuff the lower part of the leg with stuffing.
9-15. 14 sc without changes (7 rows)
Finish stuffing the leg. Do not stuff the last three rows. - (5 sc, 1 dec) x 2 (12)
- 12 sc without changes
Crochet 2 more sc, fasten and cut the yarn.
The body is crocheted together with the head
Start crocheting with the body. Stuff as you crochet. Start with the main color.
- 6 sc in MR (6)
- 6 inc (12)
- (1 sc, 1 inc) x 6 (18)
- (2 sc, 1 inc) x 6 (24)
- (3 sc, 1 inc) x 6 (30)
- (4 sc, 1 inc) x 6 (36)
In the next row, we will crochet the legs. The marker runs in the middle of the back. - 6 sc, 6 sc together with the leg, 12 sc, 6 sc together with the leg, 6 sc (36)
8-12. 36 sc without changes (5 rows) - (4 sc, 1 dec) x 6 (30)
14-15. 30 sc without changes (2 rows) - (3 sc, 1 dec) x 6 (24)
- 24 sc without changes
- (4 sc, 1 dec) x 4 (20)
Gradually stuff the body with stuffing. In the next row, we will crochet the arms. - Align the arms relative to the legs, the distance between the arms in front and back will be 5 sc and 5 sc, we will crochet together with the arms. A total of 20 sc in the row.
- (2 sc, 1 dec) x 5 (15)
- (3 sc, 1 dec) x 3 (12)
Stuff the body with stuffing to the end. Continue crocheting. (reminder, the body is crocheted together with the head)
Start crocheting the head:
Crochet with the main color. Stuff as you crochet.
- 12 inc (24)
- (1 sc, 1 inc) x 12 (36)
- (5 sc, 1 inc) x 6 (42)
- 42 sc without changes
- (13 sc, 1 inc) x 3 (45)
6-7. 45 sc without changes (2 rows) - (13 sc, 1 dec) x 3 (42)
9-10. 42 sc without changes (2 rows)
Start stuffing the head with stuffing, first very well, distribute the stuffing densely in the neck area so the head does not wobble.
- (5 sc, 1 dec) x 6 (36)
12-14. 36 sc without changes (3 rows)
Insert the eyes between the 9th and 10th rows. - (4 sc, 1 dec) x 6 (30)
- (3 sc, 1 dec) x 6 (24)
- (2 sc, 1 dec) x 6 (18)
- (1 sc, 1 dec) x 6 (12)
Finish stuffing the head with stuffing. - 6 dec (6), tighten the opening, fasten and hide the yarn.
Assembly and finishing:
Sew the face between the 2nd and 10th rows, slightly flattening it.
Make a head tightening:
Insert the needle with yarn in color from below in the middle, at the junction of the body and head, between the 21st row of the body and the 1st row of the head.
Bring it out under the left eye from the outer edge, stepping back to the other edge of the eye.
Insert the needle and bring it out at the initial point, tighten not very much.
Then bring the needle out under the right eye from the outer edge, stepping back to the other edge of the eye.
Insert the needle and bring it out at the initial point, tighten not very much.
Tie the yarn and repeat the above.
Tie the yarn, cut and hide it in the head.
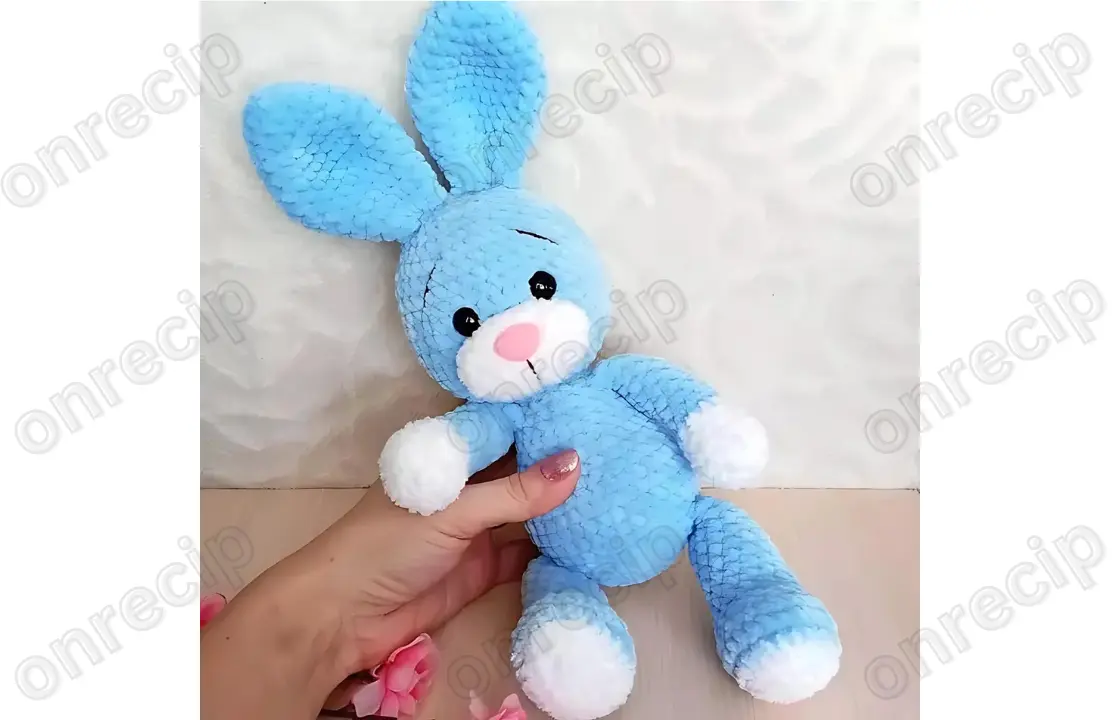
Sew the ears on top of the head, slightly squeezing them on the sides. Shape the face. Embroider eyebrows. Sew the tail so it serves as a support when sitting.
Author: Oksana Dolgova – @lovetoys_for_you.
Enjoy!

