
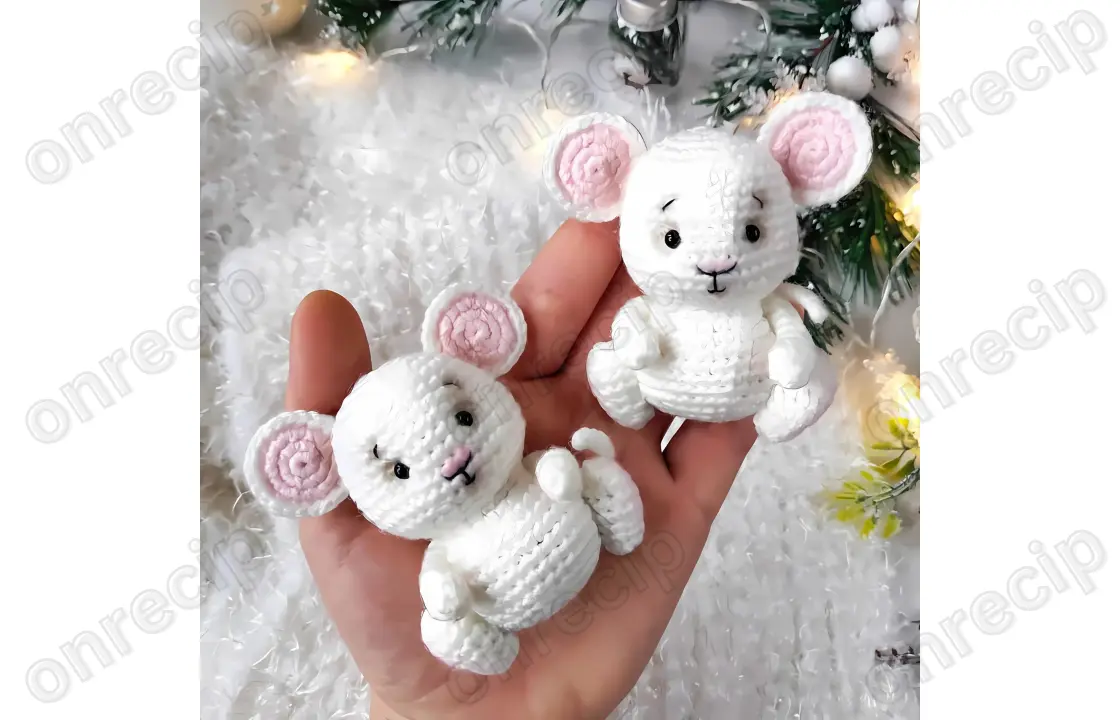
Head and Body (one piece):
- 6 SC in MR
- 6 INC (12)
- (1 SC, INC)*6 (18)
- (2 SC, INC)*6 (24)
- (3 SC, INC)*6 (30)
6-7. 30 SC - (4 SC, INC)*6 (36)
9-10. 36 SC - (5 SC, INC)*6 (42)
12-13. 42 SC - (5 SC, DEC)*6 (36)
- (4 SC, DEC)*6 (30)
- (3 SC, DEC)*6 (24)
- (2 SC, DEC)*6 (18)
- (2 SC, INC)*6 (24)
- (3 SC, INC)*6 (30)
- (4 SC, INC)*6 (36)
21-25. 36 SC - (4 SC, DEC)*6 (30)
- (3 SC, DEC)*6 (24)
Start stuffing with fiberfill.
- (2 SC, DEC)*6 (18)
- (1 SC, DEC)*6 (12)
- 6 DEC (6)
Finish stuffing. Cut the yarn, leaving a tail, and close the hole with a needle. Secure and hide the tail.
Legs (make 2):
- 6 SC in MR
- 6 INC (12)
3-5. 12 SC - (2 SC, DEC)*3 (9)
- 9 SC
Start stuffing.
- (1 SC, DEC)*3 (6)
Finish stuffing. Cut the yarn, leaving a tail, and close the hole with a needle. Secure and hide the tail.
Tip: Give the legs a slightly flattened shape; they should not be fully round.
Arms (make 2):
- 6 SC in MR
- (1 SC, INC)*3 (9)
- 9 SC
- (1 SC, DEC)*3 (6)
5-9. 6 SC (5 rounds)
Do not stuff the arms!
Cut the yarn, leaving a tail, and close the hole with a needle. Secure and hide the tail.
Ears (make 2 pink and 2 white):
- 6 SC in MR
- 6 INC (12)
- (1 SC, INC)*6 (18)
Secure with SL ST and hide the yarn tails on the wrong side. Cut off the excess.
Place the pink and white ear pieces together with the wrong sides facing each other, ensuring the end stitches align.
Using white yarn, crochet around the ear: (2 SC, INC)*5 around both pink (inner) and white (outer) parts. Finish with a SL ST.
Leave a yarn tail for sewing! Hide the starting yarn tail.
Attaching the Legs:
First, place 2 pins one above the other: the first between rows 22 and 23, and the second between rows 27 and 28. From the top pin, count 8 stitches in both directions and place pins. From the bottom pin, count 4 stitches in both directions and place pins. These pins mark the toes and heels of the legs.
Position the legs as shown in the photo and secure them with pins. Check for symmetry. Sew the legs to the body, alternating stitches between the legs and the body to ensure a secure attachment. Press the leg against the body to maximize the contact area while sewing.
Attaching the Arms:
Mark the entry and exit points for the needle using pins. The pins should be placed between the 3rd and 4th rows from where the head meets the body, approximately above the toes of the legs. Check for symmetry.
- Insert the needle at the marked point on the left side of the mouse and bring it out through the right side at the marked spot. Pull the needle through, leaving a yarn tail on the left side for tying.
- Thread the needle through the arm under the last row, catching 2 stitches.
- Insert the needle back into the body at the same spot where it exits and bring it out on the left side at the marked spot.
- Thread the left arm onto the yarn in the same way as the right. Repeat the process again for extra strength.
- After bringing the yarn through the left arm, pull both yarn ends tightly to secure the arms close to the body and slightly indent the torso.
- Tie the yarn ends in a secure knot and hide the tails inside the body.
Autor: @bosikom_za_kotom / translated by onrecip
Enjoy!