
If you want to add safety eyes, this is the time to do it. Insert them between the 4th and 5th rows of turning rows.
Back Part
Dark green yarn:
- 5 sc in MR
- 5 inc (10)
- (1 inc, 1 sc) x 5 (15)
- (1 inc, 2 sc) x 5 (20)
- (1 inc, 3 sc) x 5 (25)
- (1 inc, 4 sc) x 5 (30)
- (1 inc, 5 sc) x 5 (35)
- (1 inc, 6 sc) x 5 (40)
- (1 inc, 7 sc) x 5 (45)
- (1 inc, 8 sc) x 5 (50)
Fasten off and cut the yarn.
You should have a pentagon shape. Turn it so the end of the round is at the bottom. Attach the dark green yarn to the top left corner. Begin crocheting from the wrong side in turning rows:
- 10 sc, 1 ch, turn (10)
2-4. 10 sc, 1 ch, turn (10) - 1 dec, 6 sc, 1 dec, 1 ch, turn (8)
- 8 sc, 1 ch, turn (8)
- 1 dec, 4 sc, 1 dec, 1 ch, turn (6)
- 6 sc
Now crochet around with 65 sc. Repeat this 3 times (or more) to create a deep “cup,” sl st in the first stitch.
Sew the two parts together with 65 sc using dark green yarn. Stuff as you go.
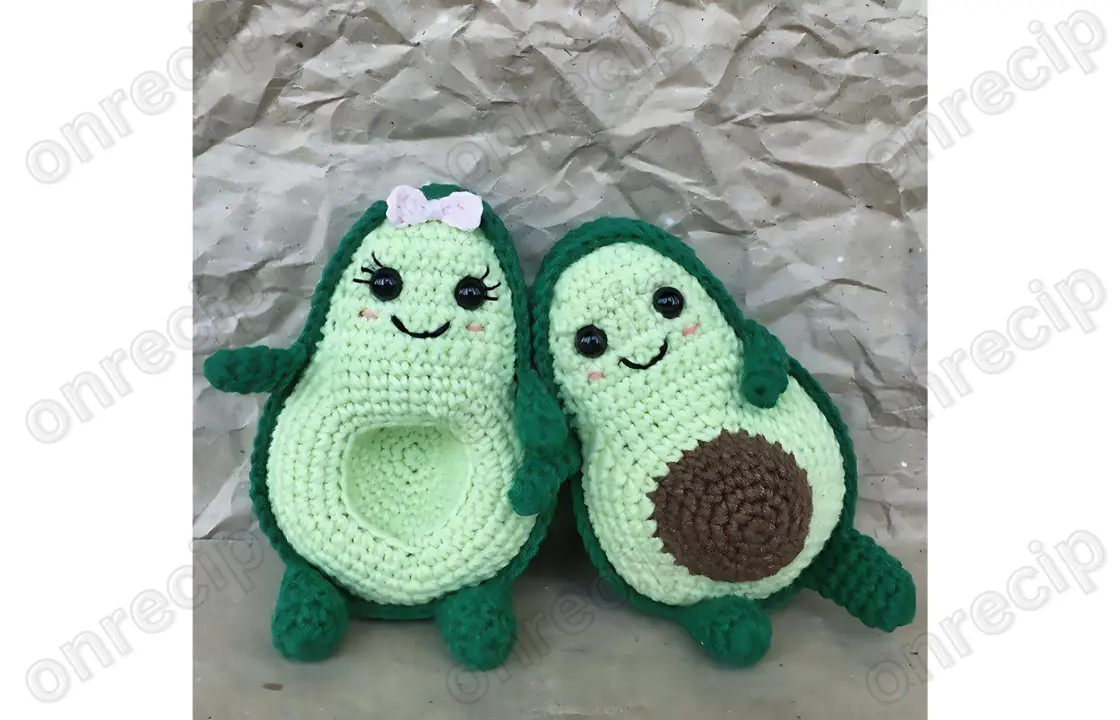
If you want a simple avocado, it’s done.
But if you want a super cute avocado, continue with the following steps.
Arms (2 pieces)
- 6 sc in MR
2-5. 6 sc
Fasten off, leaving a long tail for sewing.
Legs (2 pieces)
- 10 sc in MR
2-6. 10 sc
Fasten off, leaving a long tail for sewing.
Sew the arms and legs to the body. Embroider the mouth and cheeks.
Your little avocado is ready!
Author: LeftHandedCrochet
Enjoy!
Pages: 1 2


