
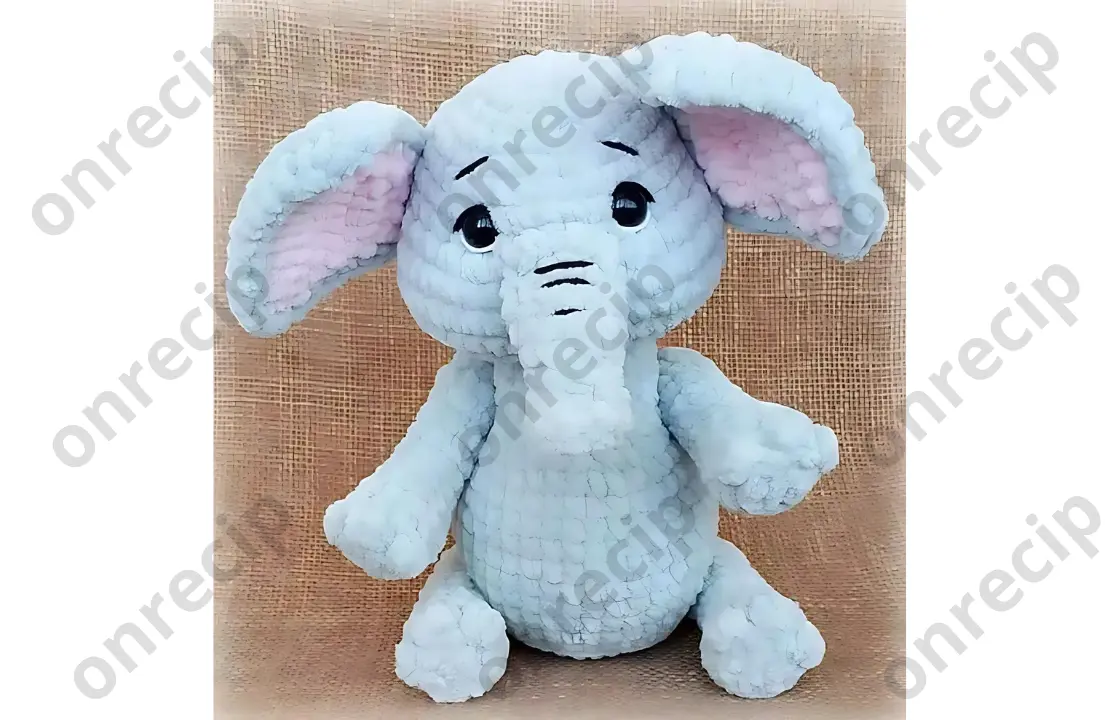
Here is a free crochet pattern for a plush elephant by Irina Podolyuk (@іrοvуаzunсhiki). The instructions are suitable for beginners and use plush yarn. You can crochet the elephant using any plush yarn of two colors and the corresponding crochet hook.
Materials and Tools:
- Plush Yarn: Himalaya Dolphin Baby (Gray for the elephant)
- Plush Yarn: Himalaya Dolphin Baby (Pink for the ears)
- Yarn for embroidery (for the face)
- Crochet hook (4 mm)
- Toy safety eyes
- Stuffing for toys
- Needle for sewing parts
- Scissors
Abbreviations:
- KA: Magic ring (magic circle)
- ch: Chain stitch
- sc: Single crochet
- dc: Double crochet
- (…) x n: Repeat the instructions inside parentheses n times.
Crochet Instructions for the Plush Elephant
Head:
- 6 sc into KA
- 6 increases = 12 sc
- (1 sc, 1 increase) x 6 = 18 sc
- (2 sc, 1 increase) x 6 = 24 sc
- (3 sc, 1 increase) x 6 = 30 sc
- (4 sc, 1 increase) x 6 = 36 sc
7-9. 36 sc - 6 increases, 6 sc, 6 increases, 18 sc = 48 sc
11-13. 48 sc - 6 decreases, 6 sc, 6 decreases, 18 sc = 36 sc
- (4 sc, 1 decrease) x 6 = 30 sc
- (1 sc, 1 decrease) x 10 = 20 sc
Continue decreasing until the head is closed.
Trunk:
- 6 sc into KA
- (1 sc, 1 increase) x 3 = 9 sc
- 9 sc through the back loops = 9 sc
4-5. 9 sc - (2 sc, 1 increase) x 3 = 12 sc
7-9. 12 sc
Stuff the trunk, then fold the edges and work 6 sc to close. - 1 decrease, 2 sc, 1 decrease = 4 sc
Sew the trunk to the head.
Ears (2 pieces in gray and 2 pieces in pink):
In gray yarn:
- Start with a chain of 5 ch, turn and crochet in rows:
- 4 sc
- 2 increases, 2 sc = 6 sc
- 4 sc, 1 increase, 1 sc = 7 sc
- 1 sc, 1 increase, 5 sc = 8 sc
- 1 increase, 5 sc, 1 increase, 1 sc = 10 sc
- 1 sc, 1 increase, 7 sc, 1 increase = 12 sc
7-9. 12 sc
In pink yarn:
- Start with a chain of 5 ch, turn and crochet in rows:
- 4 sc
- 2 increases, 2 sc = 6 sc
- 4 sc, 1 increase, 1 sc = 7 sc
- 1 sc, 1 increase, 5 sc = 8 sc
- 1 increase, 5 sc, 1 increase, 1 sc = 10 sc
- 1 sc, 1 increase, 7 sc, 1 increase = 12 sc
7-8. 12 sc
Join the two pieces (gray and pink) together, then work sc around the edges.
Body:
- 6 sc into KA
- 6 increases = 12 sc
- (1 sc, 1 increase) x 6 = 18 sc
- (2 sc, 1 increase) x 6 = 24 sc
- (3 sc, 1 increase) x 6 = 30 sc
- (4 sc, 1 increase) x 6 = 36 sc
- (5 sc, 1 increase) x 6 = 42 sc
8-14. 42 sc - (12 sc, 1 decrease) x 3 = 39 sc
- (11 sc, 1 decrease) x 3 = 36 sc
- 36 sc
- (4 sc, 1 decrease) x 6 = 30 sc
- (3 sc, 1 decrease) x 6 = 24 sc
20-22. 24 sc - (2 sc, 1 decrease) x 6 = 18 sc
Legs/Arms:
- 6 sc into KA
- 6 increases = 12 sc
- Through the back loops: 2 dc (with a common top and base), 1 sc, 2 dc (with a common top and base), 1 sc, 2 dc (with a common top and base), 7 sc = 12 sc
4-5. 12 sc - (2 sc, 1 decrease) x 3 = 9 sc
7-9. 9 sc - (2 sc, 1 increase) x 3 = 12 sc
- 12 sc
- 6 decreases = 6 sc
Tail:
Chain of 8 ch.
Assembly:
- Sew the head to the body.
- Attach the ears to the sides of the head.
- Attach the trunk in the center of the face.
- Sew the arms and legs to the body.
- Embroider the face, and attach the toy eyes.
- Sew the tail to the back of the body.
By @іrοvуаzunсhiki – translated by onrecip
Enjoy!
