- 5 sc, 3 sc in the last stitch, on the other side of the chain 4 sc, 1 inc
- 1 inc, 4 sc, 3 inc, 4 sc, 2 inc (20)
- 1 sc, 1 inc, 4 sc, (1 sc, 1 inc) x 3, 4 sc, (1 sc, 1 inc) x 2 (26)
- 2 sc, 1 inc, 4 sc, (2 sc, 1 inc) x 3, 4 sc, (2 sc, 1 inc) x 2 (32)
- 32 sc in the back loops only.
- 32 sc
- 8 sc, 6 dec, 12 sc (26)
- 2 sc, 1 dec, 4 sc, 3 dec, 4 sc, (2 sc, 1 dec) x 2 (20)
- 1 sc, 1 dec, 3 sc, 1 dec, 1 sc, 1 dec, 3 sc, (1 sc, 1 dec) x 2 (15) (if you are crocheting a boy, change the color to the color of the pants at the end of row 9) (if you are crocheting a girl, change the color to the main color)
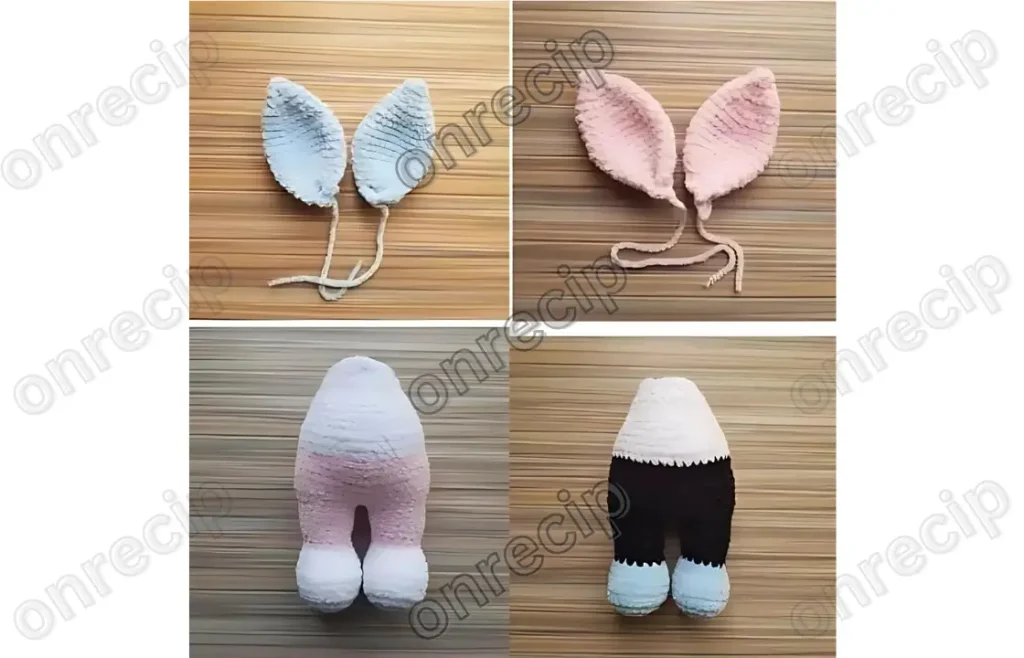
10-11. 15 sc
- 4 sc, 1 inc, 2 sc, 1 inc, 2 sc, 1 inc, 4 sc (18)
- 18 sc
- 10 sc, 1 inc, 7 sc (19)
- On the first leg, 16 sc, ss, cut the thread, on the second leg, crochet 23 sc, do not cut the thread, continue to crochet, make 2 ch and join the legs with a slip stitch and place a marker.
- 42 sc
- 8 sc, 3 inc, 15 sc, 3 inc, 13 sc (48)
18-22. 48 sc (5 rows) - (6 sc, 1 dec) x 6 (42) (if you are crocheting a girl, change the color to the color of the dress at the end of row 23)
24-26. 42 sc (if you are crocheting a boy, change the color to the color of the shirt at the end of row 25) - (5 sc, 1 dec) x 6 (36)
- 36 sc
- (4 sc, 1 dec) x 6 (30)
- 30 sc
- (3 sc, 1 dec) x 6 (24)
32-33. 24 sc - (2 sc, 1 dec) x 6 (18)
35-36. 18 sc, ss, cut the thread.
Arms (2 pieces)
Left Arm
Start crocheting with fingers. Crochet four pieces, on the fourth one do not cut the thread, continue to crochet.
6 sc in KA
6 sc
Join the fingers with ss, 3 sc on the second finger, ss, 3 sc on the third finger. Place a marker.
1-2. 18 sc
- Join the 4th finger, 3 sc with the finger on the inside, 15 sc (18)
- 3 sc on the outside of the finger, 15 sc (18)
- 4 sc, 1 dec, 3 sc, 1 dec, 7 sc (16)
- 2 sc, 3 dec, 8 sc (13) (change the color at the end of row 6 to the color of the shirt for the boy, or the color of the dress for the girl)
7-15. 13 sc (9 rows) - 6 dec, tighten the hole.
Right Arm
Start crocheting with fingers. Crochet four pieces, on the fourth one do not cut the thread, continue to crochet.
6 sc in KA
6 sc
Join the fingers with ss, 3 sc on the second finger, ss, 3 sc on the third finger. Place a marker.
1-2. 18 sc
- 6 sc, 3 sc with the finger on the inside, 9 sc (18)
- 6 sc, 3 sc with the finger on the outside, 9 sc (18)
- 1 dec, 4 sc, 1 dec, 10 sc (16)
- 3 dec, 10 sc (13) (change the color at the end of row 6 to the color of the shirt for the boy, or the color of the dress for the girl)
7-15. 13 sc (9 rows) - 6 dec, tighten the hole.
Lip
- 6 sc in KA
- 6 inc (12)
- (1 sc, 1 inc) x 6 (18)
4-7. 18 sc (4 rows) - (1 sc, 1 dec) x 6 (12)
- 12 sc
- (2 sc, 1 inc) x 6 (18)
- (3 sc, 1 inc) x 6 (24)
12-20. 24 sc (9 rows) - (3 sc, 1 dec) x 6 (18)
- (2 sc, 1 dec) x 6 (12)
- (1 sc, 1 dec) x 6 (6)
- 6 dec, tighten the hole.
Tail
6 sc in KA
6 inc (12)
(1 sc, 1 inc) x 6 (18)
(2 sc, 1 inc) x 6 (24)
(3 sc, 1 inc) x 6 (30)
3 rows of 30 sc
(3 sc, 1 dec) x 6 (24)
(2 sc, 1 dec) x 6 (18)
(1 sc, 1 dec) x 6 (12)
6 dec, tighten the hole.
Assembly and Decor:
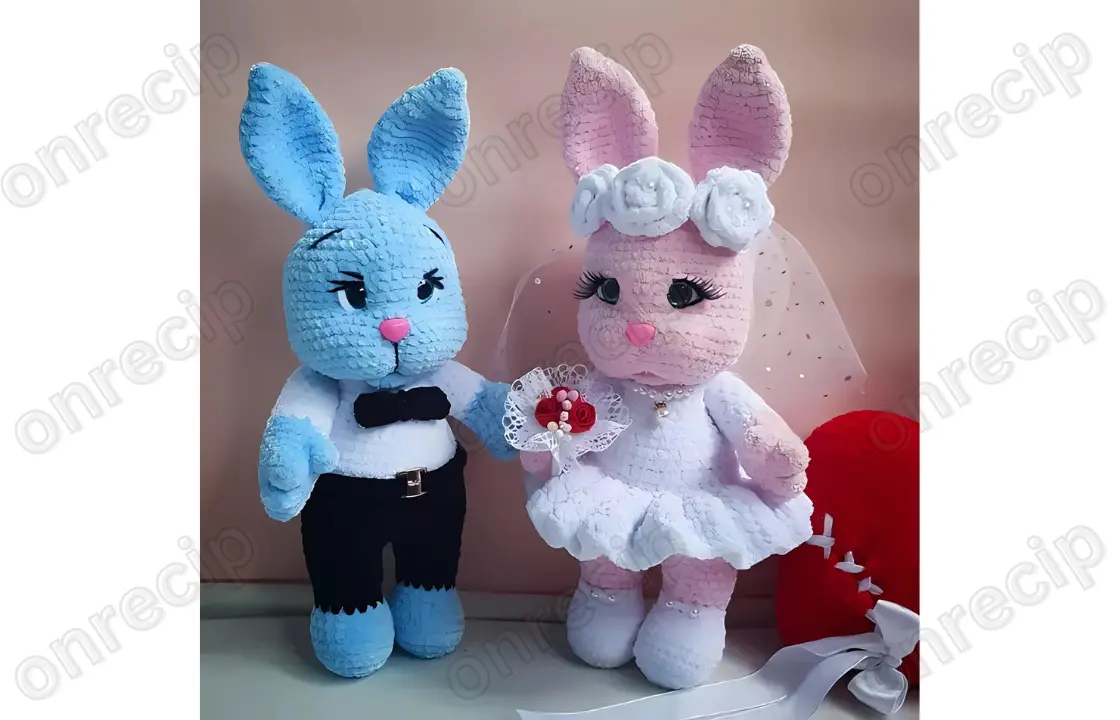
Sew the tail to the 5th row from the bottom. Sew on the arms, folding the edges of the last row in half. If desired, embroider the mouth and eyebrows, glue the eyelashes. Crochet a veil with a frill. You can crochet a bouquet of flowers or use ready-made ones.
Pattern for a mini flower (5 petals)
In a magic ring: 1 sc, 2 dc, 1 sc. Repeat 5 times. Tighten the ring, secure the thread, cut the ends. Assemble the flower and attach it to the bunny’s hand.
Congratulations, your wedding bunnies are ready! Decorate them to your liking and enjoy the process!
Author: Unknown

