
Add stuffing, evenly distributing it inside the part. Pull and cut the thread, leaving a long end for sewing. Use a needle to tighten the opening.
Body
Chain 15, crochet from the 2nd stitch from the hook:
Row 1: inc, 12 sc, 2 inc in the last stitch, on the other side of the chain: 12 sc, inc (32)
Row 2: 2 inc, 12 sc, 4 inc, 12 sc, 2 inc (40)
Row 3: (inc, 1 sc) x 2, 12 sc, (inc, 1 sc) x 4, 12 sc, (inc, 1 sc) x 2 (48)
Rows 4-6: 48 sc (48)
Without cutting the main thread, join contrasting yarn and crochet the next 2 rows.
Rows 7-8: 48 sc (48)
Switch back to the main color and crochet the next 4 rows.
Rows 9-12: 48 sc (48)
Switch to contrasting color for the next 2 rows.
Row 13: 48 sc (48)
Row 14: (6 sc, dec) x 6 (42)
Cut the additional color thread; now crochet only with the main color.
Rows 15-16: 42 sc (42)
Row 17: (5 sc, dec) x 6 (36)
Row 18: 36 sc (36)
Row 19: (4 sc, dec) x 6 (30)
Rows 20-21: 30 sc (30)
Crochet 2 additional sc to finish the row evenly on the side of the body. Pull and cut the thread, hide the tail inside the part, and stuff the body tightly.
Wings for the bee and ladybug (2 parts)
Row 1: 6 sc in MR (6)
Row 2: 6 inc (12)
Row 3: (1 sc, inc) x 6 (18)
Row 4: (2 sc, inc) x 6 (24)
Row 5: (3 sc, inc) x 6 (30)
Rows 6-9: 30 sc (30)
Row 10: (13 sc, dec) x 2 (28)
Row 11: (12 sc, dec) x 2 (26)
Row 12: (11 sc, dec) x 2 (24)
Row 13: (10 sc, dec) x 2 (22)
Row 14: (9 sc, dec) x 2 (20)
Row 15: (8 sc, dec) x 2 (18)
Row 16: (7
sc, dec) x 2 (16)
Row 17: (6 sc, dec) x 2 (14)
Row 18: (5 sc, dec) x 2 (12)
Row 19: (4 sc, dec) x 2 (10)
Row 20: (3 sc, dec) x 2 (8)
Stuff the wing. Pull and cut the thread, leaving a tail for sewing.
Butterfly wings (2 parts)
Row 1: 8 sc in MR (8)
Row 2: 8 inc (16)
Row 3: (3 sc, inc) x 4 (20)
Row 4: (4 sc, inc) x 4 (24)
Rows 5-8: 24 sc (24)
Row 9: (5 sc, inc) x 4 (28)
Rows 10-14: 28 sc (28)
Pull and cut the thread, leaving a tail for sewing. Stuff the wing.
Assembly
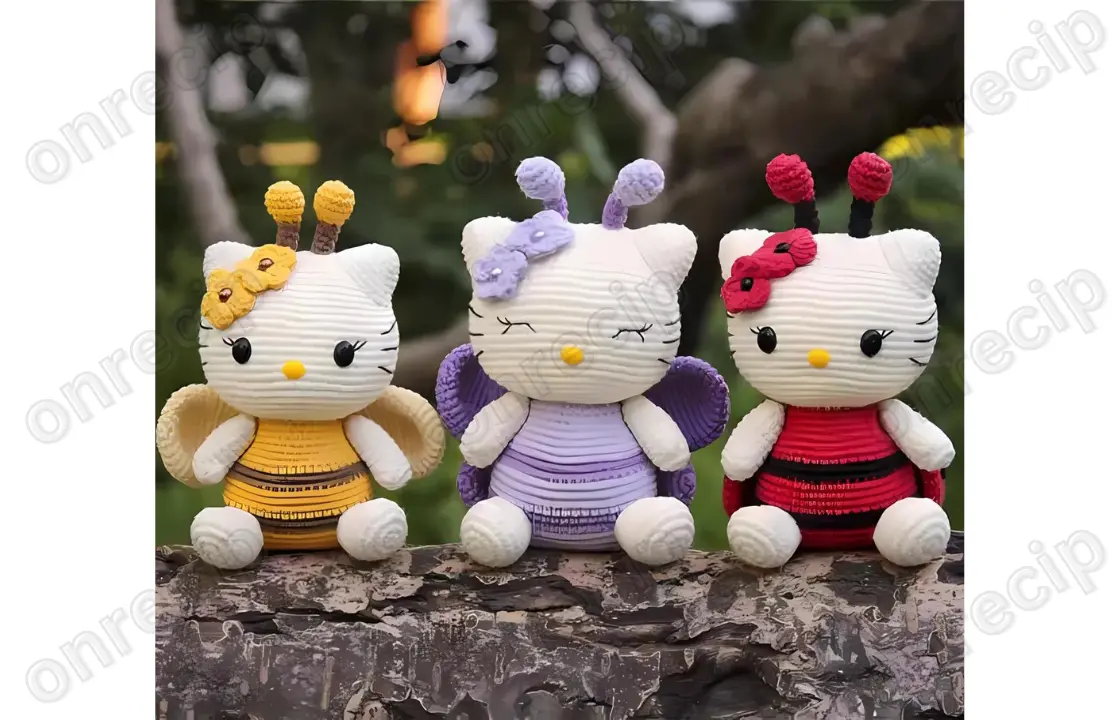
Sew the head to the body. Sew the ears to the head at rows 5-7 from the top. Sew the hands and legs to the body. Sew the flowers to the head at rows 10-13, slightly diagonally from the ear. Sew the tail in the middle of the back at row 8 from the bottom. Sew the antennae on the top of the head between the ears, filling with stuffing. Sew the eyes and nose, embroider the mouth and whiskers. Decorate the wings with spots (for the ladybug) or stripes (for the bee) if desired. Attach the wings to the back.
Your Spring Kitty is ready! Enjoy your crochet!
Author: Evgeniya Pristayovich – @eugenyeva.
Enjoy!
