
Stuff the lower part of the leg tightly, the very top — loosely. Fold the part in half and crochet 4 sc along both edges of the loops. Secure the thread and cut it off.
Hind legs (2 parts)
The marker of the beginning of the row goes in a straight line in the center of the leg at the back. We start crocheting with 2 ch or with an amigurumi ring with an additional color thread (bright pink 80309):
Row 1: 6 sc in the second loop from the hook or in KA (6)
Row 2: 6 inc (12)
Row 3: (1 sc, inc) x 6 times (18)
Row 4: (2 sc, inc) x 6 times (24)
Change the thread color to the main one (white 1002).
Row 5: 24 sc in the back loop of the previous row.
Rows 6-8 (3 rows): 24 sc (24)
Row 9: 4 sc, 8 dec, 4 sc (16)
Add filler to the foot. Stuff tightly.
Rows 10-17 (8 rows): 16 sc (16)
Row 18: 8 dec (8)
Stuff the part tightly to the end. Fold it in half and crochet 4 sc along both edges of the loops. Secure the thread and cut it off.
Body
We start crocheting with 2 ch or with an amigurumi ring with the main color thread (the marker of the beginning of the row goes in a straight line in the center of the back):
Row 1: 6 sc in the second loop from the hook or in KA (6)
Row 2: 6 inc (12)
Row 3: (1 sc, inc) x 6 times (18)
Row 4: (2 sc, inc) x 6 times (24)
Row 5: (3 sc, inc) x 6 times (30)
Row 6: (4 sc, inc) x 6 times (36)
Row 7: (5 sc, inc) x 6 times (42)
Row 8: (6 sc, inc) x 6 times (48)
In row 9, we crochet the hind legs: 9 sc, 4 sc together with the first leg, 22 sc, 4 sc together with the second leg, 9 sc (48)
Rows 10-15 (6 rows): 48 sc (48)
Row 16: (6 sc, dec) x 6 times (42)
Row 17: (5 sc, dec) x 6 times (36)
Row 18: (4 sc, dec) x 6 times (30)
Row 19: (3 sc, dec) x 6 times (24)
Row 20: 24 sc (24)
Start adding filler. Stuff tightly. The body should take on a shape similar to a ball.
Row 21: (2 sc, dec) x 6 times (18)
Do not forget to follow the marker of the beginning of the row: in the center of the back. If necessary, make displacement loops.
Row 22: crochet the upper legs: 2 sc, 4 sc together with the first leg, 6 sc, 4 sc together with the second leg, 2 sc (18)
Row 23: (1 sc, dec) x 6 times (12)
Row 24: 12 sc (12)
Go to crocheting the head.
Head
Row 25: 12 inc (24)
Row 26: (3 sc, inc) x 6 times (30)
Row 27: (4 sc, inc) x 6 times (36)
Row 28: (5 sc, inc) x 6 times (42)
Row 29: (6 sc, inc) x 6 times (48)
Row 30: (7 sc, inc) x 6 times (54)
Rows 31-34 (4 rows): 54 sc (54)
Row 35: (
7 sc, dec) x 6 times (48)
Row 36: (6 sc, dec) x 6 times (42)
Row 37: (5 sc, dec) x 6 times (36)
Row 38: (4 sc, dec) x 6 times (30)
Row 39: (3 sc, dec) x 6 times (24)
Row 40: (2 sc, dec) x 6 times (18)
Stuff the head tightly. In the center of the head, at the top, the filler should be a little denser, as if to form a bump, so the toy will be more stable and stand on its own.
Row 41: (1 sc, dec) x 6 times (12)
Row 42: 6 dec (6)
Add a little more filler. Crochet 1 sl st and cut the thread, secure it, hide the end.
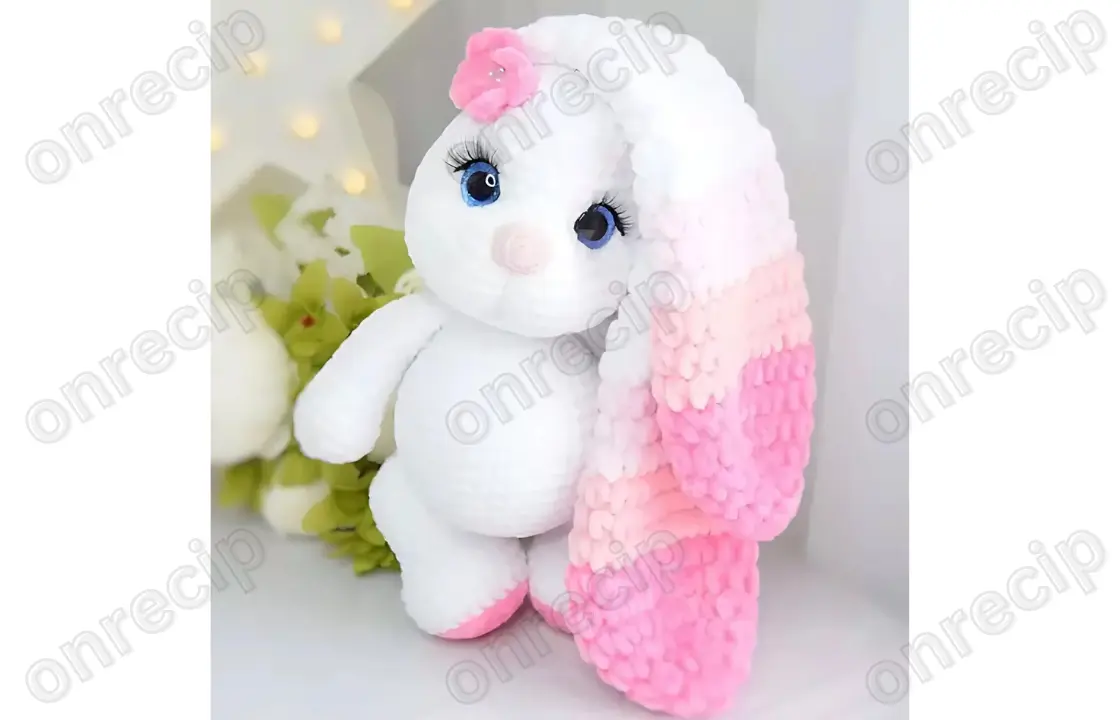
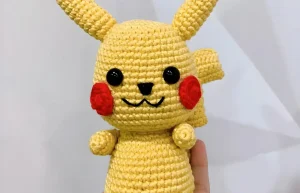
Assembly
Sew the ears and tail to the bunny. Sew on the nose and glue the eyes, attaching eyelashes. Decorate the bunny with a crocheted flower, a bow, or a satin ribbon.
Your bunny star is ready!
Author: Maria Konovalova – @ma_ko_toys.
Enjoy!