
Insert the eyes between the 22nd and 23rd rows (6th and 7th rows of the head) so that there is a distance of 4 sc between them (everything is clearly marked in the photo).
26th row: (3 sc, dec) x 6 (24)
27th row: (2 sc, dec) x 6 (18)
28th row: (sc, dec) x 6 (12)
Stuff the head.
29th row: dec x 6 times (6), slip stitch.
Tighten the ring, hide the yarn.
Muzzle
1st row: 6 sc in KA (6)
2nd row: inc x 6 times (12)
3rd row: (sc, inc) x 6 times (18)
4th row: 3 inc from hdc, 6 sc, 3 inc from hdc, 6 sc (24)
5-6th rows (2 rows): 24 sc each (24)
Finish the row with a slip stitch to even out the edge.
Ears (2 parts)
1st row: 6 sc in KA (6)
2nd row: inc x 6 times (12)
3rd row: (sc, inc) x 6 times (18)
4th row: (2 sc, inc) x 6 times (24)
5-6th rows (2 rows): 24 sc each
7th row: (2 sc, dec) x 6 times (18)
Assembling the body
1st step:
Stuff the muzzle lightly and position it symmetrically to the eyes. The top edge of the muzzle is between the 22nd and 23rd rows, the bottom between the 18th and 19th rows. Carefully sew, gradually stuffing the muzzle more densely.
2nd step:
Embroider the nose. Thread the yarn where the mouth should hypothetically be (between the 3rd and 4th rows from the edge), bring the yarn out at the top between the first and second rows from the edge, and embroider the nose. After finishing, bring the yarn out at the mouth area 1 sc left or right, tie the ends into knots, hide the threads. Or insert the nose on a safety fastener.
3rd step:
Tightening. I will use black Iris. This same yarn will be used to embroider the muzzle. Insert the yarn into the mouth area, leaving a tail. Bring the needle out on the outside of the left eye, insert the needle from the inside of the left eye. Bring it out from the inside of the right eye, pull the yarn.
The yarn should pass over the left eye, slide between the eye and yarn and lie on the leg of the eye. Then insert the needle from the outside corner of the right eye and bring it out at the mouth, stepping back from the edge of the yarn 1 sc. Tighten the yarn until a pleasing muzzle is formed. Tie a knot. Repeat the focus a second time. Embroider the bridge of the nose, tie knots, and hide the ends of the yarn.
4th step:
Position the ears symmetrically to the eyes and muzzle across four rows. Sew.
5th step:
Embroider the eyebrows.
6th step:
Attach the paws. The paws are attached with buttons. The so-called “button fastening.” When performing this type of fastening along with yarn, I recommend using thin fishing line.
I use 13 mm buttons and a long needle. First, I start attaching the “hands.” They are closest to the muzzle, making them easier to place symmetrically to the muzzle.
I start with the left paw. I always insert the needle on the side that will be in contact with the body. In the middle of the row between the last and penultimate rows. Insert the needle, bring it out on the other side, thread the button, return the needle to the same hole on the paw.
Now you need to thread the needle with yarn symmetrically through the body. I do this at the level between the 2nd and 3rd rows from the neck. That is, between the rows where 18 sc and 24 sc are. Then the second paw is threaded onto the needle, the button, and the needle returns back through the body to the left paw. The knot is made under the armpit, and the ends along with the knot are pulled inside the left paw.
The “legs” are attached in the same way. Between the 5th and 6th
rows. I position them between the rows where 12 sc and 15 sc are.
7th step:
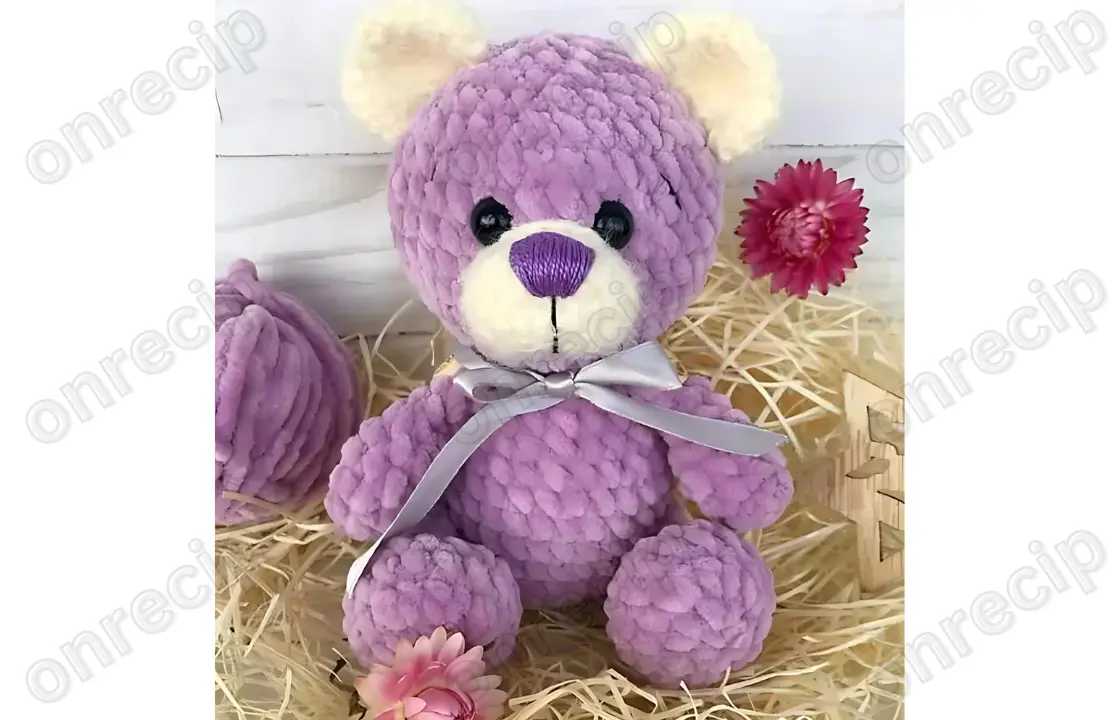
Tie a ribbon bow, and the Marshmallow Bear is ready!
Author: Tatiana Chelnokova – @t.chelnokova83.
Enjoy!
