
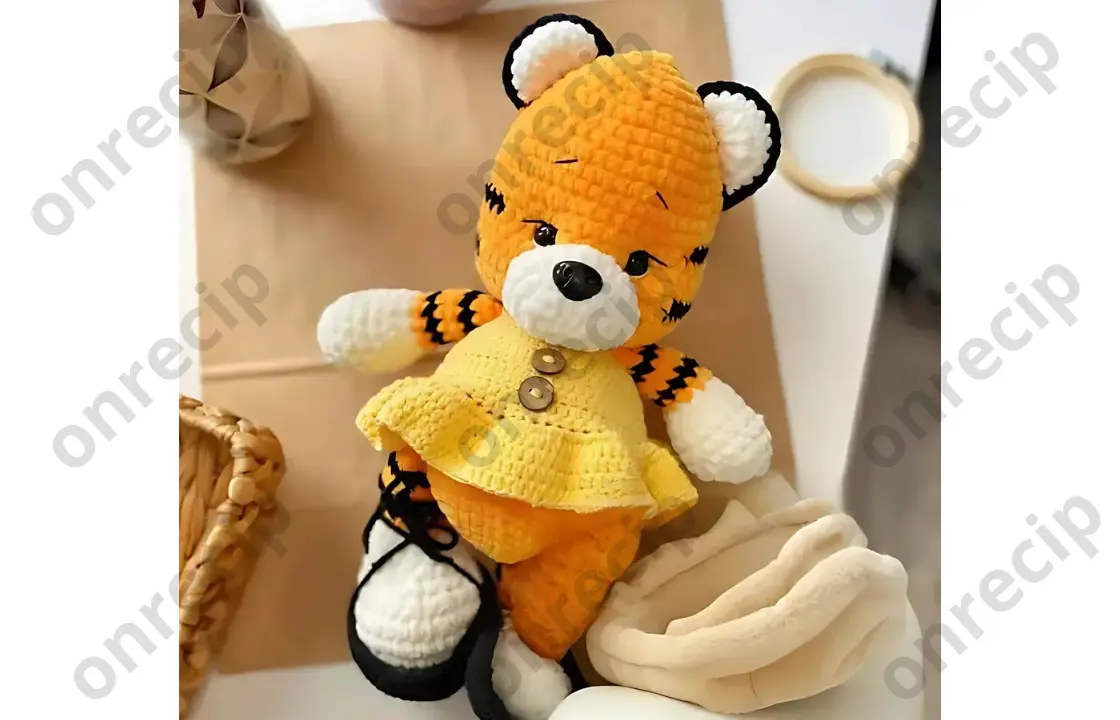
This is a free crochet pattern for a tiger cub in a dress, created by @malenkiyroni. Using this description, you can crochet a tiger cub in a dress with any plush yarn and an appropriate hook. The shoes and dress are made from YarnArt Jeans cotton blend yarn, though you can substitute any similar materials. The clothes are optional, so you can skip them to make a male tiger cub. Decoration and final touches are up to you.
The finished size of the tiger cub toy is approximately 28-30 cm.
Materials and Tools
- Plush yarn: Himalaya Dolphin Baby (main color: 1 skein, black: 1/3 skein, white: 1/3 skein)
- Cotton blend yarn: YarnArt Jeans (color for the dress: 1 skein, color for the shoes: 1/4 skein)
- Embroidery floss for the facial details
- 4 mm hook (main body), 2.5 mm hook (for clothing)
- 14 mm safety eyes
- Safety nose
- Stuffing (fiberfill)
- Stitch markers
- Pins
- Decorative buttons
- Needle for sewing parts
- Scissors
Abbreviations
- MR: magic ring
- ch: chain stitch
- sl st: slip stitch
- sc: single crochet
- hdc: half double crochet
- inc: increase (2 stitches in the same stitch)
- dec: decrease (single crochet 2 stitches together)
- (…) x n: repeat the instructions n times
Tiger Cub Head (in the main color)
- 6 sc in MR
- 6 inc
- (1 sc, inc) x 6
- (2 sc, inc) x 6
- (3 sc, inc) x 6
- 30 sc
- (4 sc, inc) x 6
- 36 sc
- (5 sc, inc) x 6
- (13 sc, inc) x 6
- (14 sc, inc) x 6
12-14. 48 sc
Change to black yarn. - 32 sc in black, 16 sc in main color
16-18. 48 sc
Change to black yarn. - 32 sc in black, 16 sc in main color
20-21. 48 sc - (6 sc, inc) x 6
- (5 sc, inc) x 6
- (4 sc, inc) x 6
- (3 sc, inc) x 6
- (6 sc, inc) x 3
Fasten off and leave a long tail for sewing the head to the body.
Body
- 6 sc in MR
- 6 inc
- (1 sc, inc) x 6
- (2 sc, inc) x 6
- (3 sc, inc) x 6
- (4 sc, inc) x 6
- (5 sc, inc) x 6
- 42 sc
- (12 sc, inc) x 3
- (13 sc, inc) x 3
11-14. 48 sc - (6 sc, dec) x 6
16-17. 42 sc - (12 sc, dec) x 3
- (11 sc, dec) x 3
- (4 sc, dec) x 6
- 30 sc
- (3 sc, dec) x 6
- (6 sc, dec) x 3
Legs
Start with a chain of 6:
- 4 sc, 3 sc in one stitch, 3 sc, inc
- inc, 3 sc, 3 inc, 3 sc, 2 inc
- sc, inc, 4 sc, inc, 3 sc, inc, 4 sc, inc, 2 sc
- 2 sc, inc, (4 sc, inc) x 3, 4 sc
- (sc, inc) x 2, 4 sc, inc, sc, inc, 3 sc, inc, sc, inc, 4 sc, inc, 2 sc
6-7. 34 sc - 8 sc, dec, (sc, dec) x 5, 7 sc, dec
- 7 sc, 2 dec, 2 sc, 2 dec, 7 sc, dec
- 7 sc, 4 dec, 7 sc
- 5 sc, dec, 4 sc, dec, 5 sc
- 6 sc, 2 dec, 6 sc
Switch to the main color.
13-18. 14 sc
Stuff the parts with fiberfill. Fold in half and crochet sc through both edges. Make sure that when folded, the legs face forward.
Arms
- 6 sc in MR
- 6 inc
- sc, inc, 2 sc, inc, (sc, inc) x 2, 2 sc, inc
4-7. 17 sc - 6 sc, dec, sc, dec, 6 sc
- 3 sc, 2 dec, sc, 2 dec, 3 sc
10-15. 11 sc
Stuff with fiberfill, fold, and crochet sc through both edges.
Muzzle
Start with a chain of 5:
- inc, 2 sc, 3 sc in one stitch, 2 sc, inc
- 2 inc, 2 sc, 3 inc, 3 sc, inc
- (sc, inc) x 2, 3 sc, (sc, inc) x 3, 3 sc, inc
- (2 sc, inc) x 2, 3 sc, (2 sc, inc) x 3, 4 sc, inc
Fasten off, leaving a long tail for sewing (it’s best to use thin white YarnArt Jeans for sewing).
Ears
Crochet in rows. Make 2 pieces in white and 2 in orange:
- 6 sc in MR, ch 1
- 6 inc, ch 1
- 12 sc
Fasten off, then join the white and orange pieces by crocheting around the semi-circle in black yarn. Leave a long tail for sewing.
Tail
Using the main color:
- 6 sc in MR
- (1 sc, inc) x 3
3-5. 9 sc
Switch to black yarn. - 9 sc
Switch to orange.
7-8. 9 sc
Switch to black yarn. - 9 sc
Switch to orange.
10-14. 9 sc
Fold and crochet sc through both edges. Leave a tail for sewing.
Shoes for the Toy
- 6 sc in MR
- 6 inc
- (1 sc, inc) x 6
- (2 sc, inc) x 6
- (3 sc, inc) x 6
- (4 sc, inc) x 6
- (5 sc, inc) x 6
8-12. 42 hdc
Fasten off and cut the yarn.
For the ties: make 2 pieces of a 70-chain length and attach them to the shoes on both sides.
Dress for the Toy
Chain 42, ch 1:
- 42 sc, 2 ch
- (6 hdc, inc) x 6, ch 1
- 8 sc, 8 inc, skip 8 sc, 16 sc into the next stitch, 8 ch, skip 8 sc, into the next 8 sc, 2 ch
- 48 hdc, 2 ch
- (7 sc, inc) x 6, 2 ch
- 54 hdc, 2 ch
- (8 sc, inc) x 6, 2 ch
- 60 hdc, 2 ch
- (9 hdc, inc) x 6, 2 ch
10-11. 66 hdc, 2 ch - (10 hdc, inc) x 6, join in the round
- sc inc in every stitch
14-18. hdc in every stitch
Fasten off and cut the yarn. Crochet around the back opening with sc stitches, try the dress on the toy, and sew the back. Sew 2 decorative buttons on the front.
Toy Assembly
- Insert the eyes between the 15th and 16th rows, leaving 8 stitches between them.
- Sew the head to the body.
- Attach the nose and sew the muzzle neatly to the head.
- Use your preferred technique for shaping the face.
- Embroider eyelashes and eyebrows.
- Sew the arms at the seam between the head and body.
- Sew the legs between rows 10 and 11 of the body.
- Attach the ears to the head and hide the remaining yarn inside the ear.
Your crocheted tiger cub is ready! Feel free to share your creation and tag the author @malenkiyponi on social media.
created by @malenkiyroni / translated by onrecip
Enjoy!
