
Materials:
- Yarn: Himalaya Dolphin Baby or its equivalent;
- Hook size: 3.5 mm;
- Eyes (beads): 6 mm;
- Stuffing (holofiber);
- YarnArt Jeans for the face details;
- Scissors, needle for sewing parts together;
- Decorative button.
Abbreviations:
- MR: Magic Ring
- CH: Chain
- SL ST: Slip Stitch
- SC: Single Crochet
- INC: Increase
- DEC: Decrease
Arms (make 2)
- 7 SC in MR
2-7. 7 SC (6 rounds) - Fold in half and crochet 3 SC across, do not stuff.
Tail
- 7 SC in MR
- 7 SC, SL ST
Leave a long tail for sewing.
Face
- 6 SC in MR
- INC in each stitch (12)
- 9 SC, SL ST (do not finish the row)
Leave a long tail for sewing.
Legs – Body – Head
- 9 SC in MR, pull tight, fasten off
- 9 SC (9)
- 3 SC, INC, 3 SC, DEC (9)
- 9 SC (9)
- 3 SC, INC, 3 SC, DEC (9)
- 8 SC, SL ST (on the first leg, cut the yarn and leave a short tail)
For the second leg, work round 6 as follows:
9 SC, 1 CH
Join the first leg and continue crocheting.
- 9 SC, 3 SC in the chain, 9 SC, 3 SC in the chain (24)
8-11. 24 SC (4 rounds) - (6 SC, DEC) x 3 (21)
- 21 SC (21)
- (DEC, 5 SC) x 3 (18)
- 18 SC (18)
- (1 SC, DEC) x 6 (12)
- 12 SC, attach the arms as you go: 2 SC, 3 SC with the arm, 3 SC, 3 SC with the arm, 1 SC (12)
- INC in each stitch (24)
19-23. 24 SC (5 rounds)
If you are using safety eyes, insert them in round 21.
- (2 SC, DEC) x 6 (18)
- (1 SC, DEC) x 6 (12)
- 6 DEC (6)
Cut the yarn and sew the opening shut with a needle.
Ears (make 2)
- 6 SC in MR
- INC in each stitch (12)
- (3 SC, INC) x 3 (15)
4-5. 15 SC (15) - (3 SC, DEC) x 3 (12)
- (2 SC, DEC) x 3 (9)
- 9 SC (9)
- (1 SC, DEC) x 3 (6)
Work 1 SL ST, leave a long tail for sewing.
Assembly
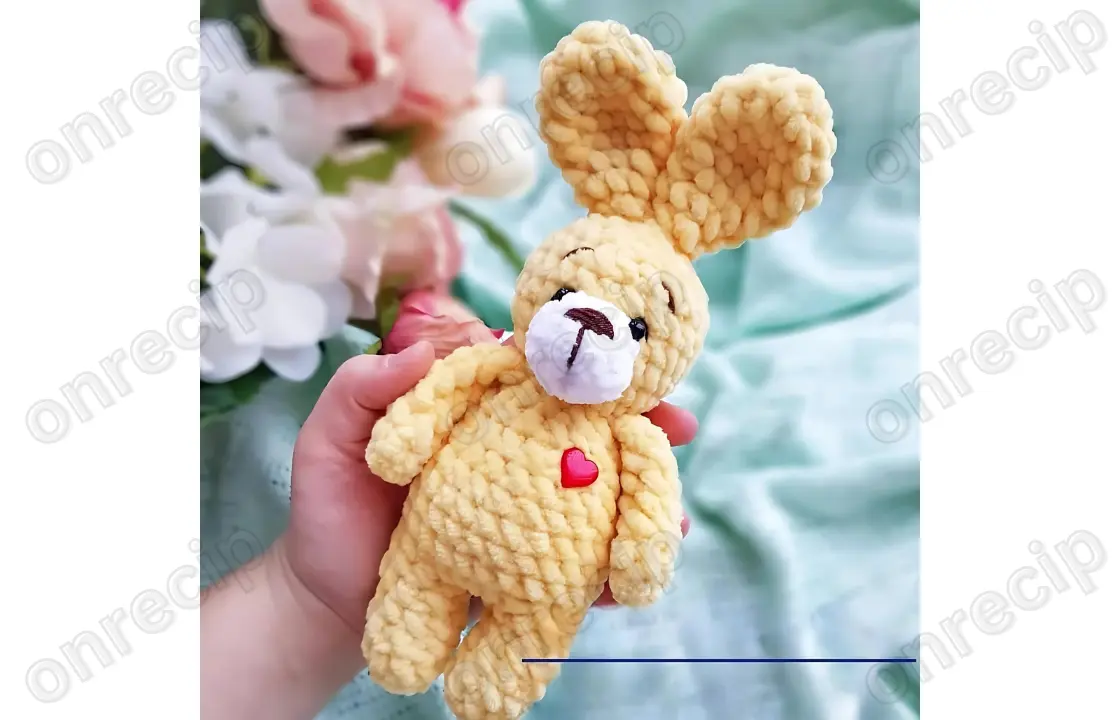
Sew the tail, face, and ears. I attach the eyes at around round 21, close to the face. When sewing them, I pull the beads slightly together to make them look neater and less prominent. Embroider the nose, eyebrows, and add a couple of stitches near the eyes to create eyelids.
You can decorate the bunny with a decorative button.
Your Sunny Bunny is ready! Congratulations!
Author: @chirka_toys / translate by onrecip
The author of the “Sunny Bunny” pattern is Ekaterina Chirkova @chirka_toys
Enjoy!
